
Introduction
The post is intended to give some guidance to those who may not be familiar with how to update their WordPress website. I'll go over some of the basic administrative tasks like adding new pages and posts, as well as how to use some of the common plugins that I use when building WordPress websites.
Log In
In order to edit your WordPress website you first need to log in so you can access the backend of your site. This can be done by going to the login page and entering your credentials. The url for the login page usually looks something like this: https://www.yourdomain.com/ wp-admin. However the exact url may vary, depending on how your website is set up.
Pages and Posts
Pages and Posts are where you'll likely spend most of your time. They're pretty similar so I'm just going to walkthrough pages, and just know that posts behave pretty much the same way with a couple differences that I will make touch on.
Add a new page
Adding a new page is pretty straightforward. Find Pages in the black sidebar on the left. From there you have two options. You can hover over it until a menu pops out and then you can click Add New Page. Alternatively, you can click the Pages link and you will be taken to a page that displays all the pages you have on your website. From their you can find the link at the top left of the page that says Add New Page and click that.
Add content to your page
WordPress pages are edited using a block editor called Gutenberg. Gutenberg provides a lot of flexibility when it comes to page creation. You can easily add text, images, and other blocks. Usually, when I build WordPress websites I'll also build custom blocks that the client can use to build their pages.
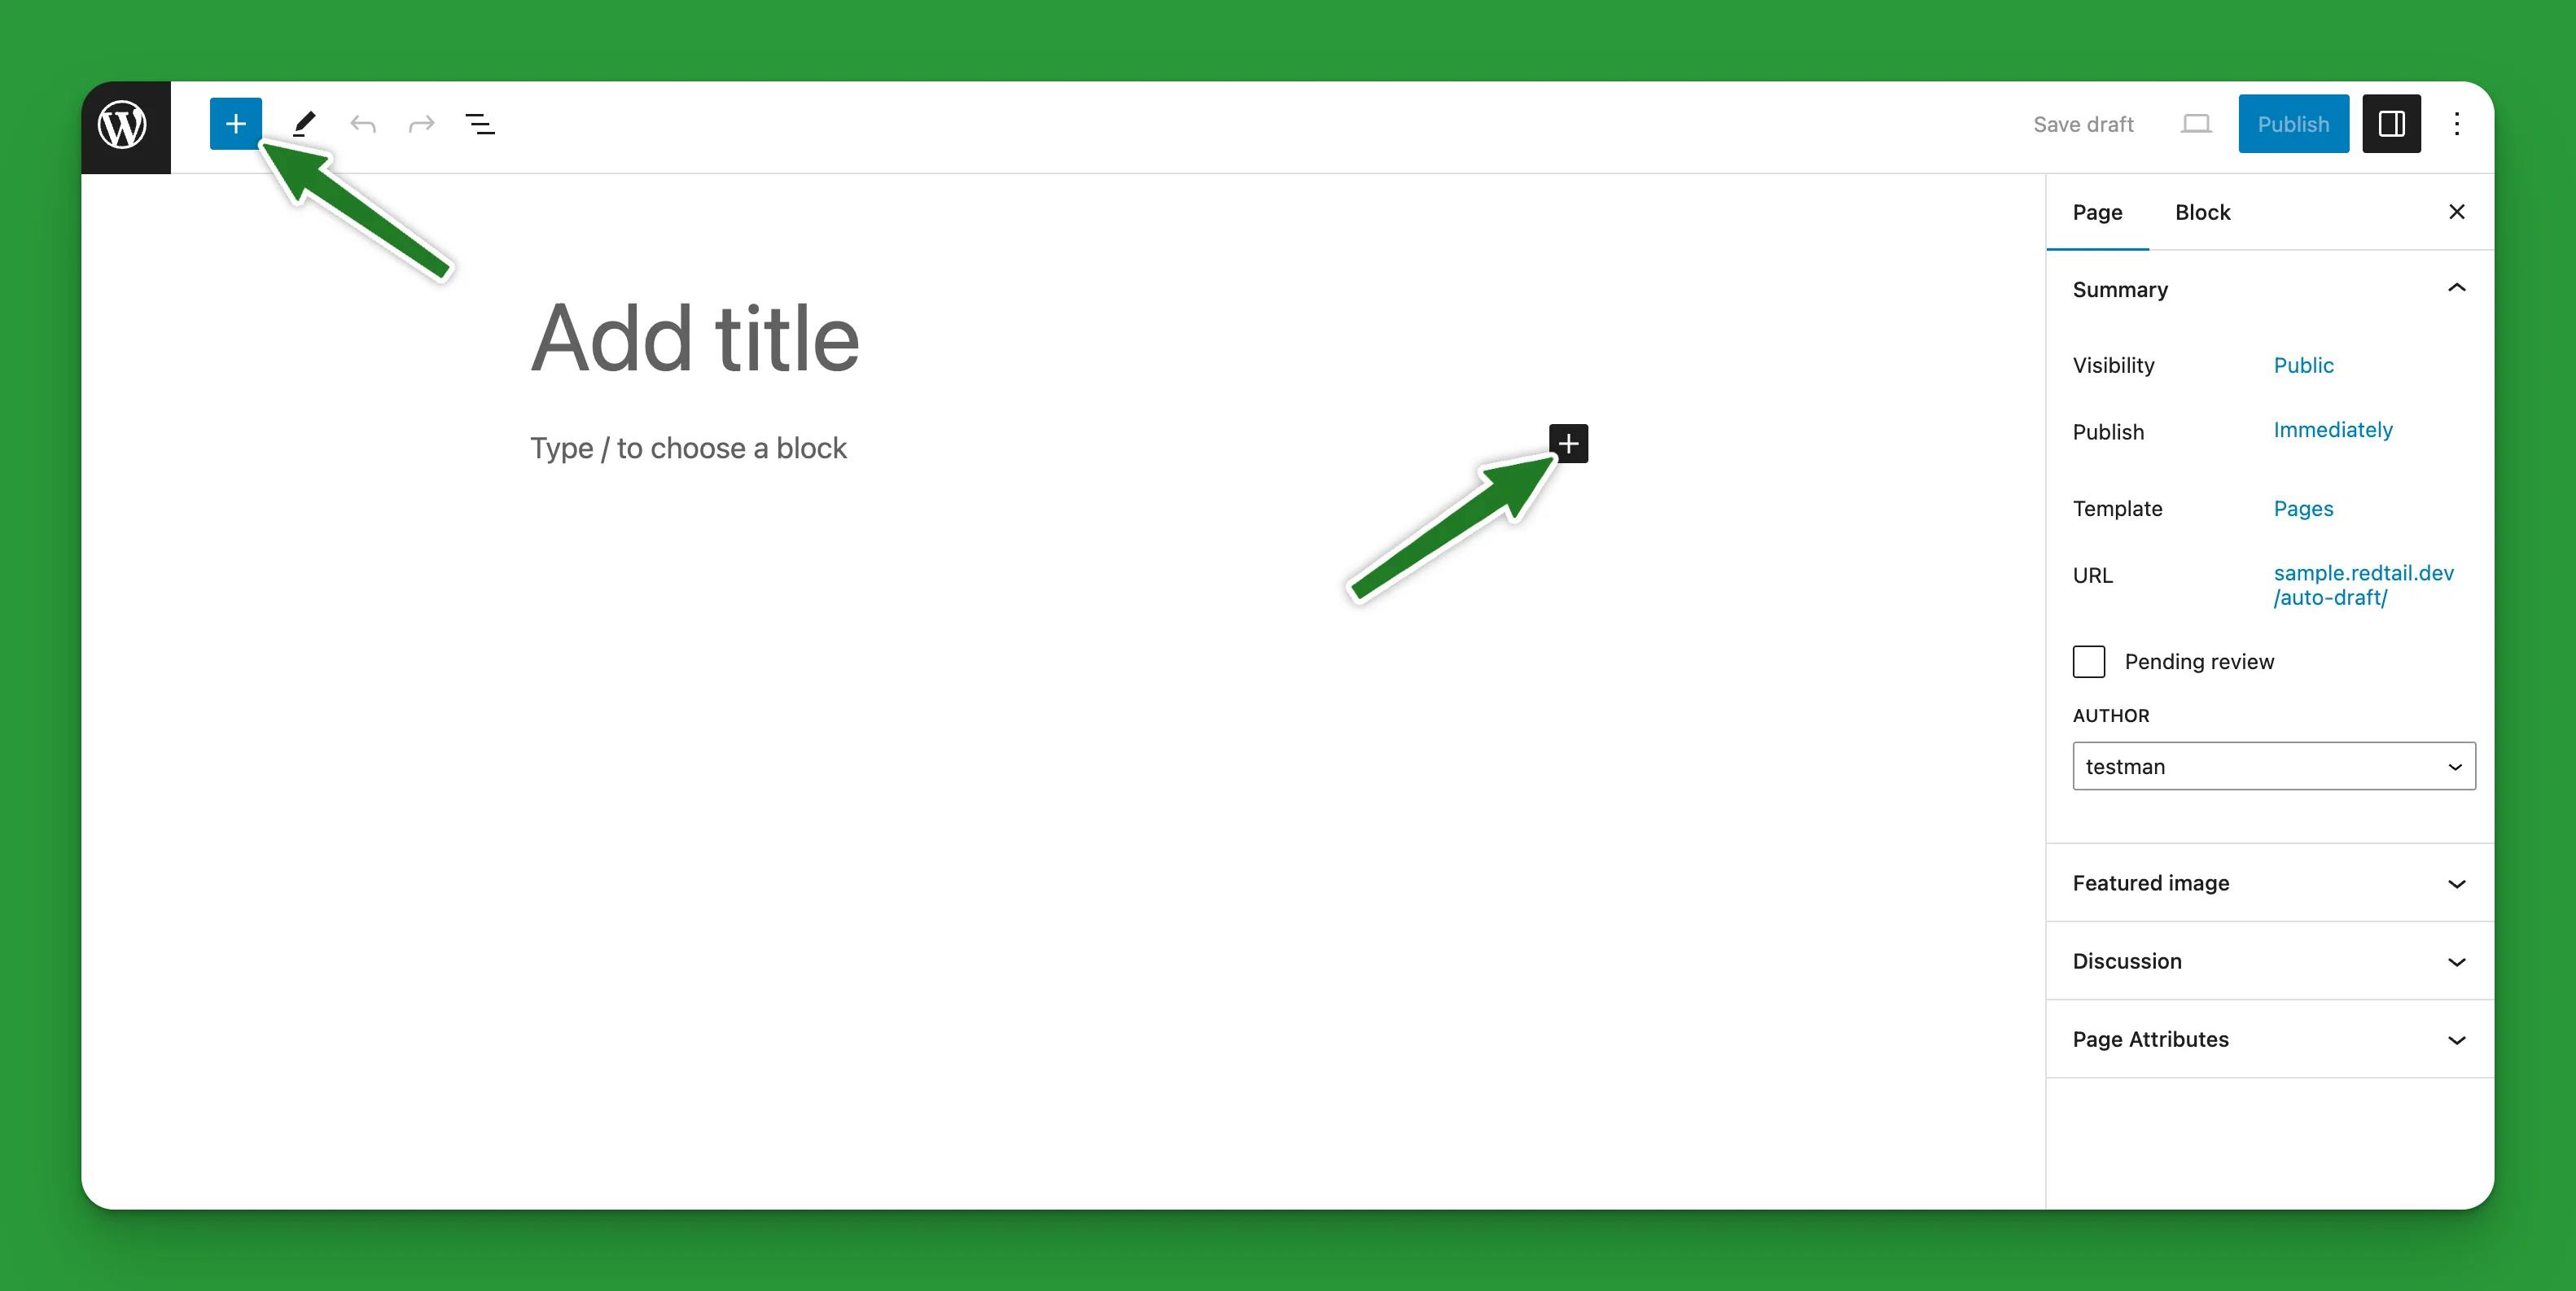
Adding blocks to a page is pretty simple You just have to click on the plus sign (+) in the top left hand corner of the page, or you can click the plus sign (+) that appears when you put your cursor in a new section of the editor.
Add content to custom blocks
Adding a custom block to a page or post is done in the same way as adding any other block. Adding or updating content, however, is a little bit different. When you add a normal WordPress block all the content is added right there where the block is displayed. When you add a custom block (a block that I've built) the content (title, image, etc.) can be added to the block from the sidebar. This is because the data for these blocks is handled with Advanced Custom Fields.
If you would rather edit the block content in the main panel instead of the sidebar, you can switch the block to edit mode by clicking the pencil in the bar at the top the page.

Block styles
Some blocks also have optional styles that can be applied. These styles can be found by clicking on the black and white circle at the top of the sidebar.
Use appropriate headings
Why?
Headings are used to build the structure of your page. This helps search engines understand what your page is about. Headings are also extremely important for those that navigate the internet using screen readers. Headings allow screen reader users to quickly scan the page to figure out what the page is about. It also helps them jump from section to section without getting lost.
How?
When you add a new heading to your page (H2, H3, etc.). It's important to make sure you're adding these in sequential order. You should never add an H3, if you haven't already added an H2. Also, you shouldn't skip H3 and add an H4 or H5. Headings should never be used solely for the purpose of making text bigger or smaller.
For example, let's say you're writing a new blog post about the different food groups. The title (H1) might be something like, Know Your Food Groups.
In your post, you might want to write a section about fruits. To start this section you would add a new H2 with the text of Fruits.
Then let's say you want to talk specifically about apples. You would start a new section using an H3 with the text of Apples, since apples is a type of fruit.
Now maybe you want to write a section about your favorite types of apples. Because you're still talking about apples, you would start a new section using an H4 with the text of My Favorite Apples.
Now you want to write a section on grapes so you will add an H3 with the text of Grapes to start a new subsection of the Fruits (H2) section.
Okay you've finished talking about fruits and you want to move on to talking about vegetables. Just like you did with fruits, you would create a new section using an H2 with the text of Vegetables. And follow the same pattern as you did with fruits when you want to talk about different types of vegetables.
example heading structure
Edit an existing page
To edit an existing page you just need to click the Pages link in the black sidebar in your WordPress backend to view a list of all your pages. Then you can either search for the page you want to edit or you can find the page in the list of pages and click the page title to go to the page editor.

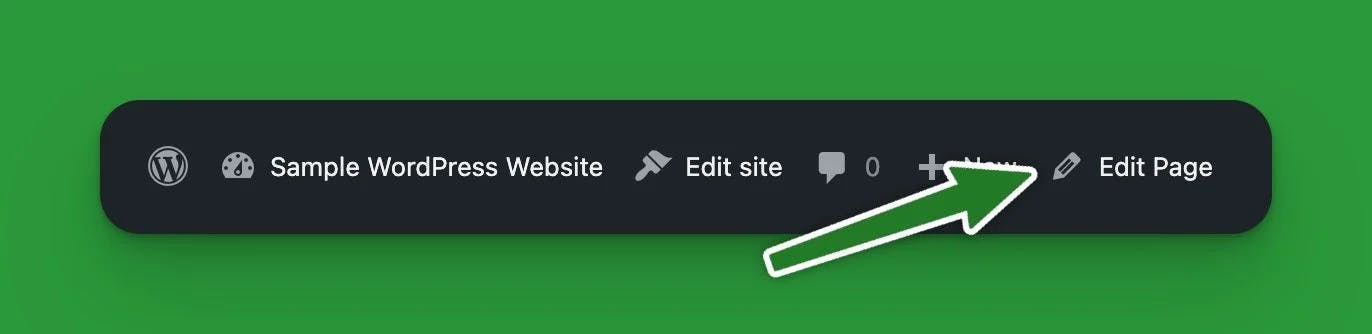
Alternatively, you can click the Edit Page link in the black toolbar that appears at the top of your website when you're logged in to your account. Click the Edit Page link from any page to edit that page.
Post categories and tags
One area where posts differ from pages is that you can add tags and categories to posts. For example, using our food groups example above, maybe you have a category named Food that all your food related articles will get assigned to. And since this blog post is about the food groups you could add tags for Fruit, Vegetable, Grains, Dairy, and Protein Foods.
Media
You can manage your images, videos, and other files in the media library. Navigate to this page by clicking Media on the black sidebar. In the media library you can add new files and edit or delete existing files.
Uploading images
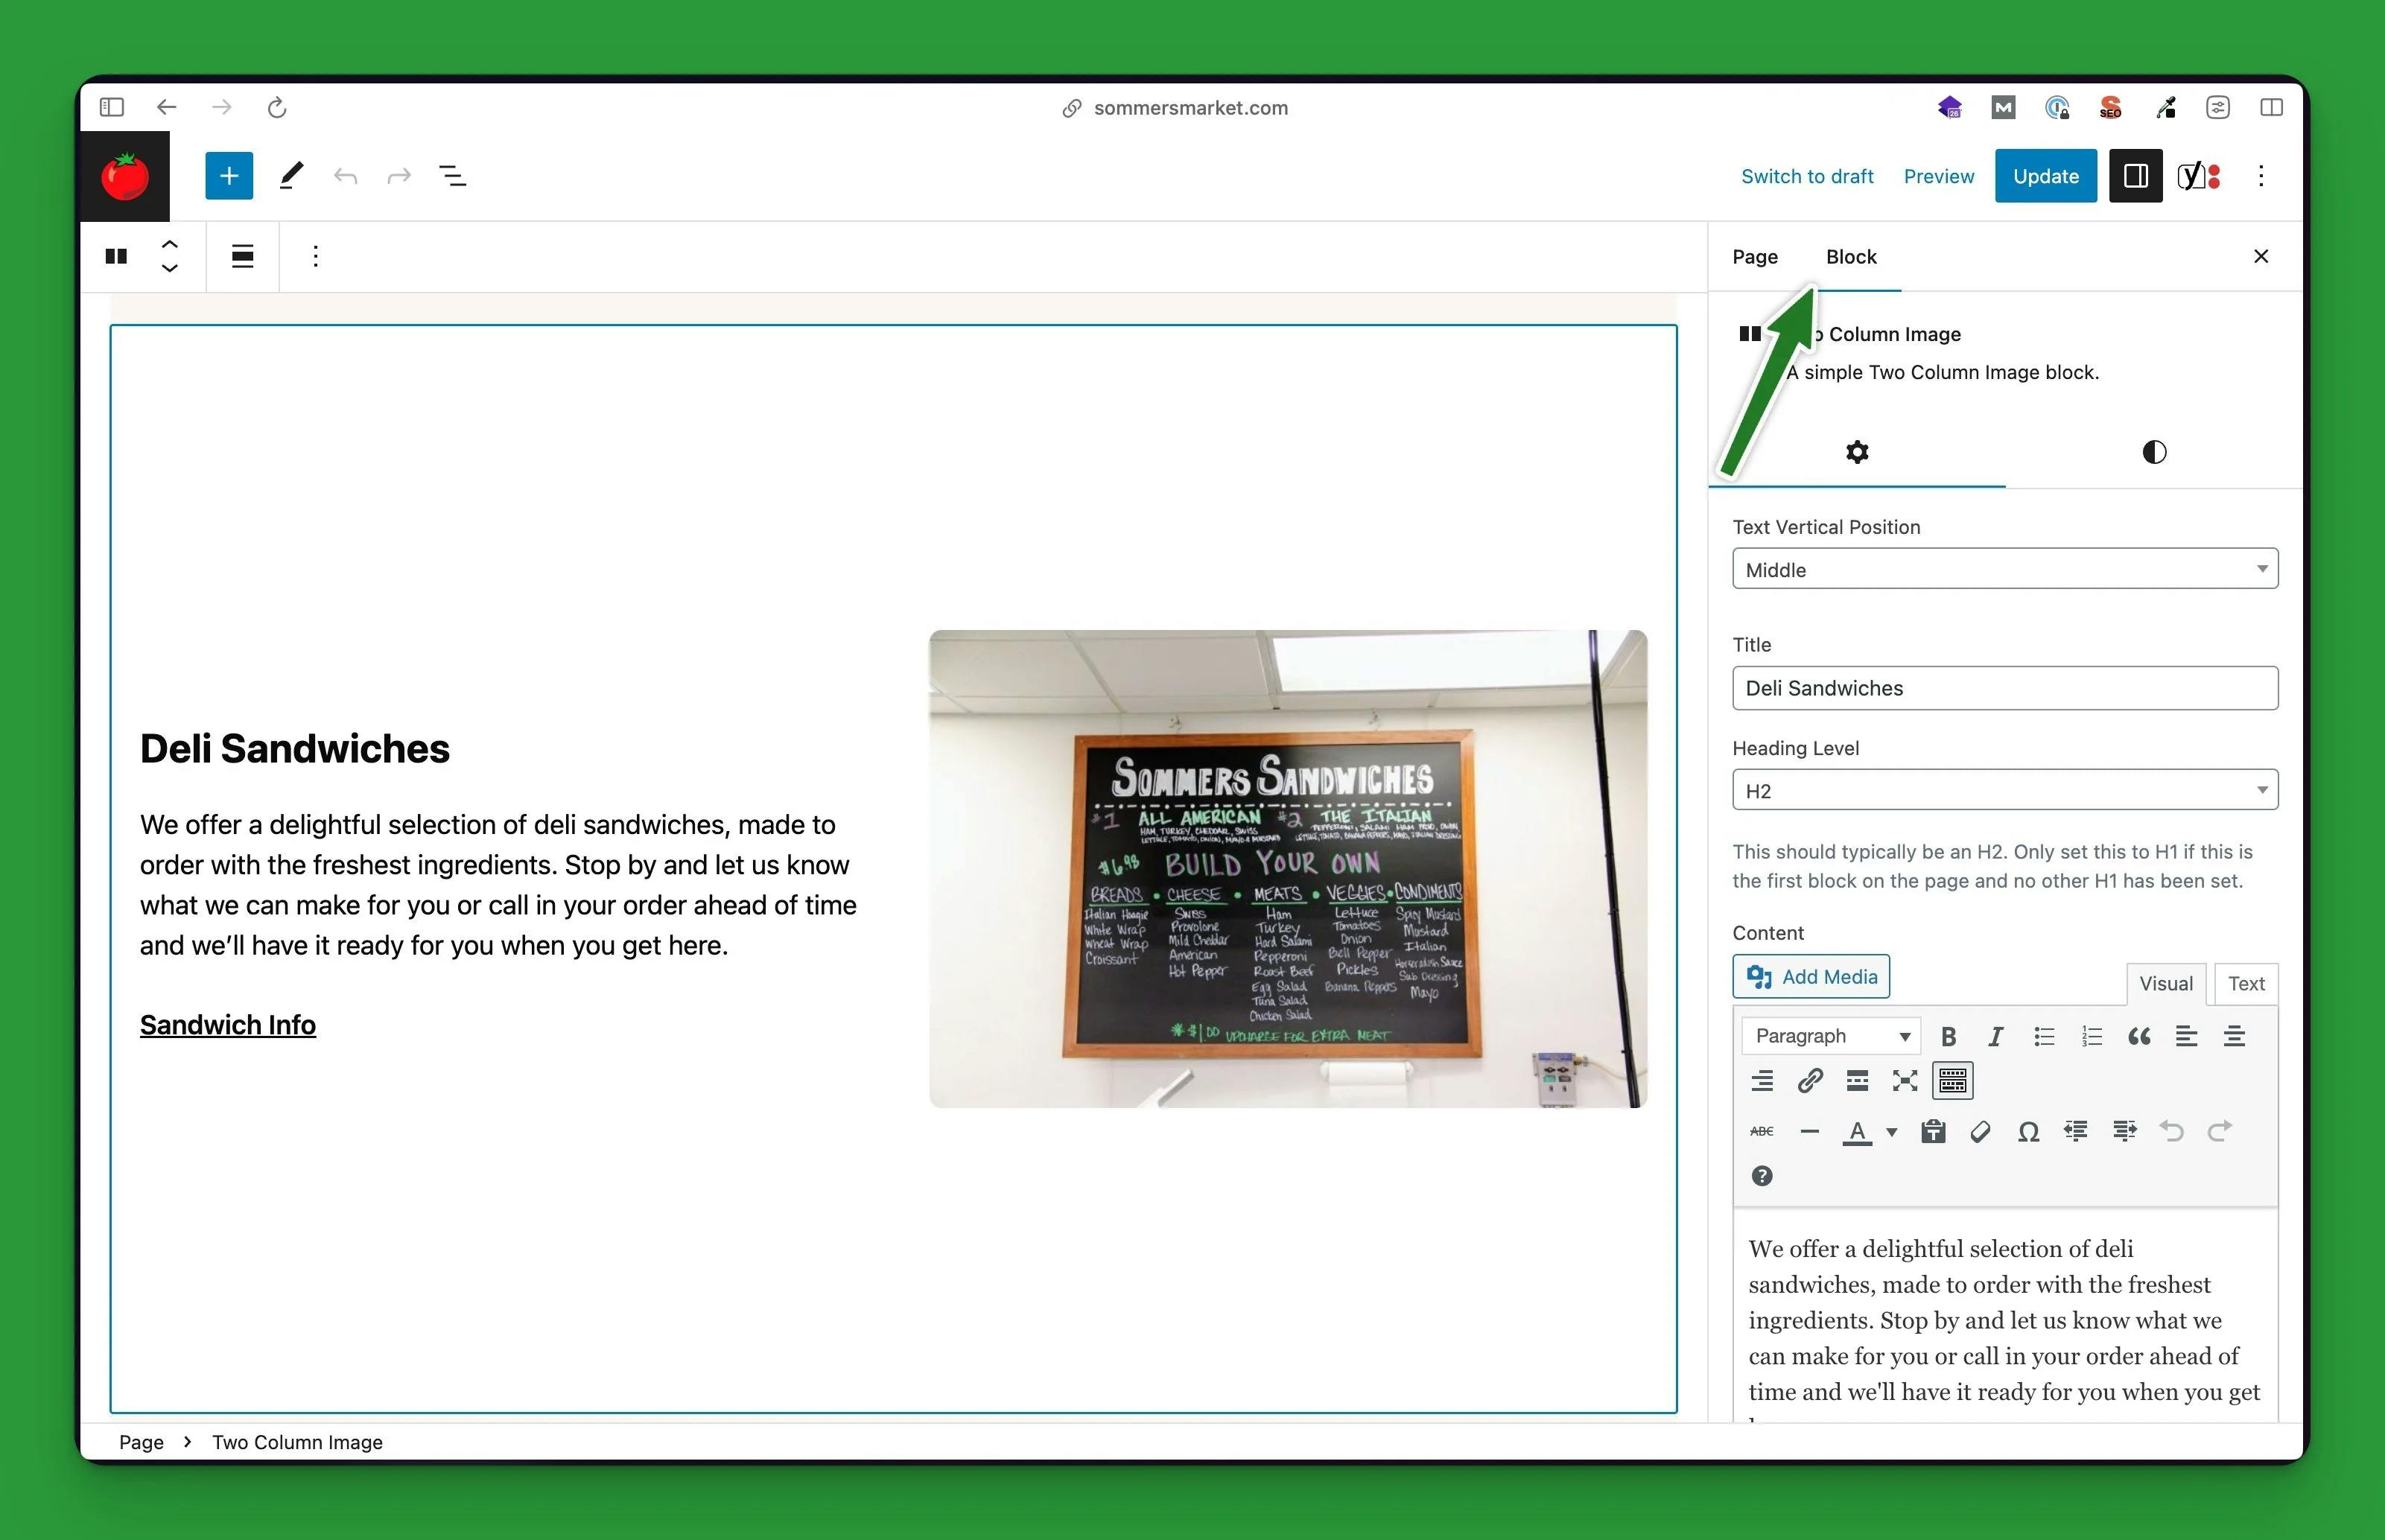
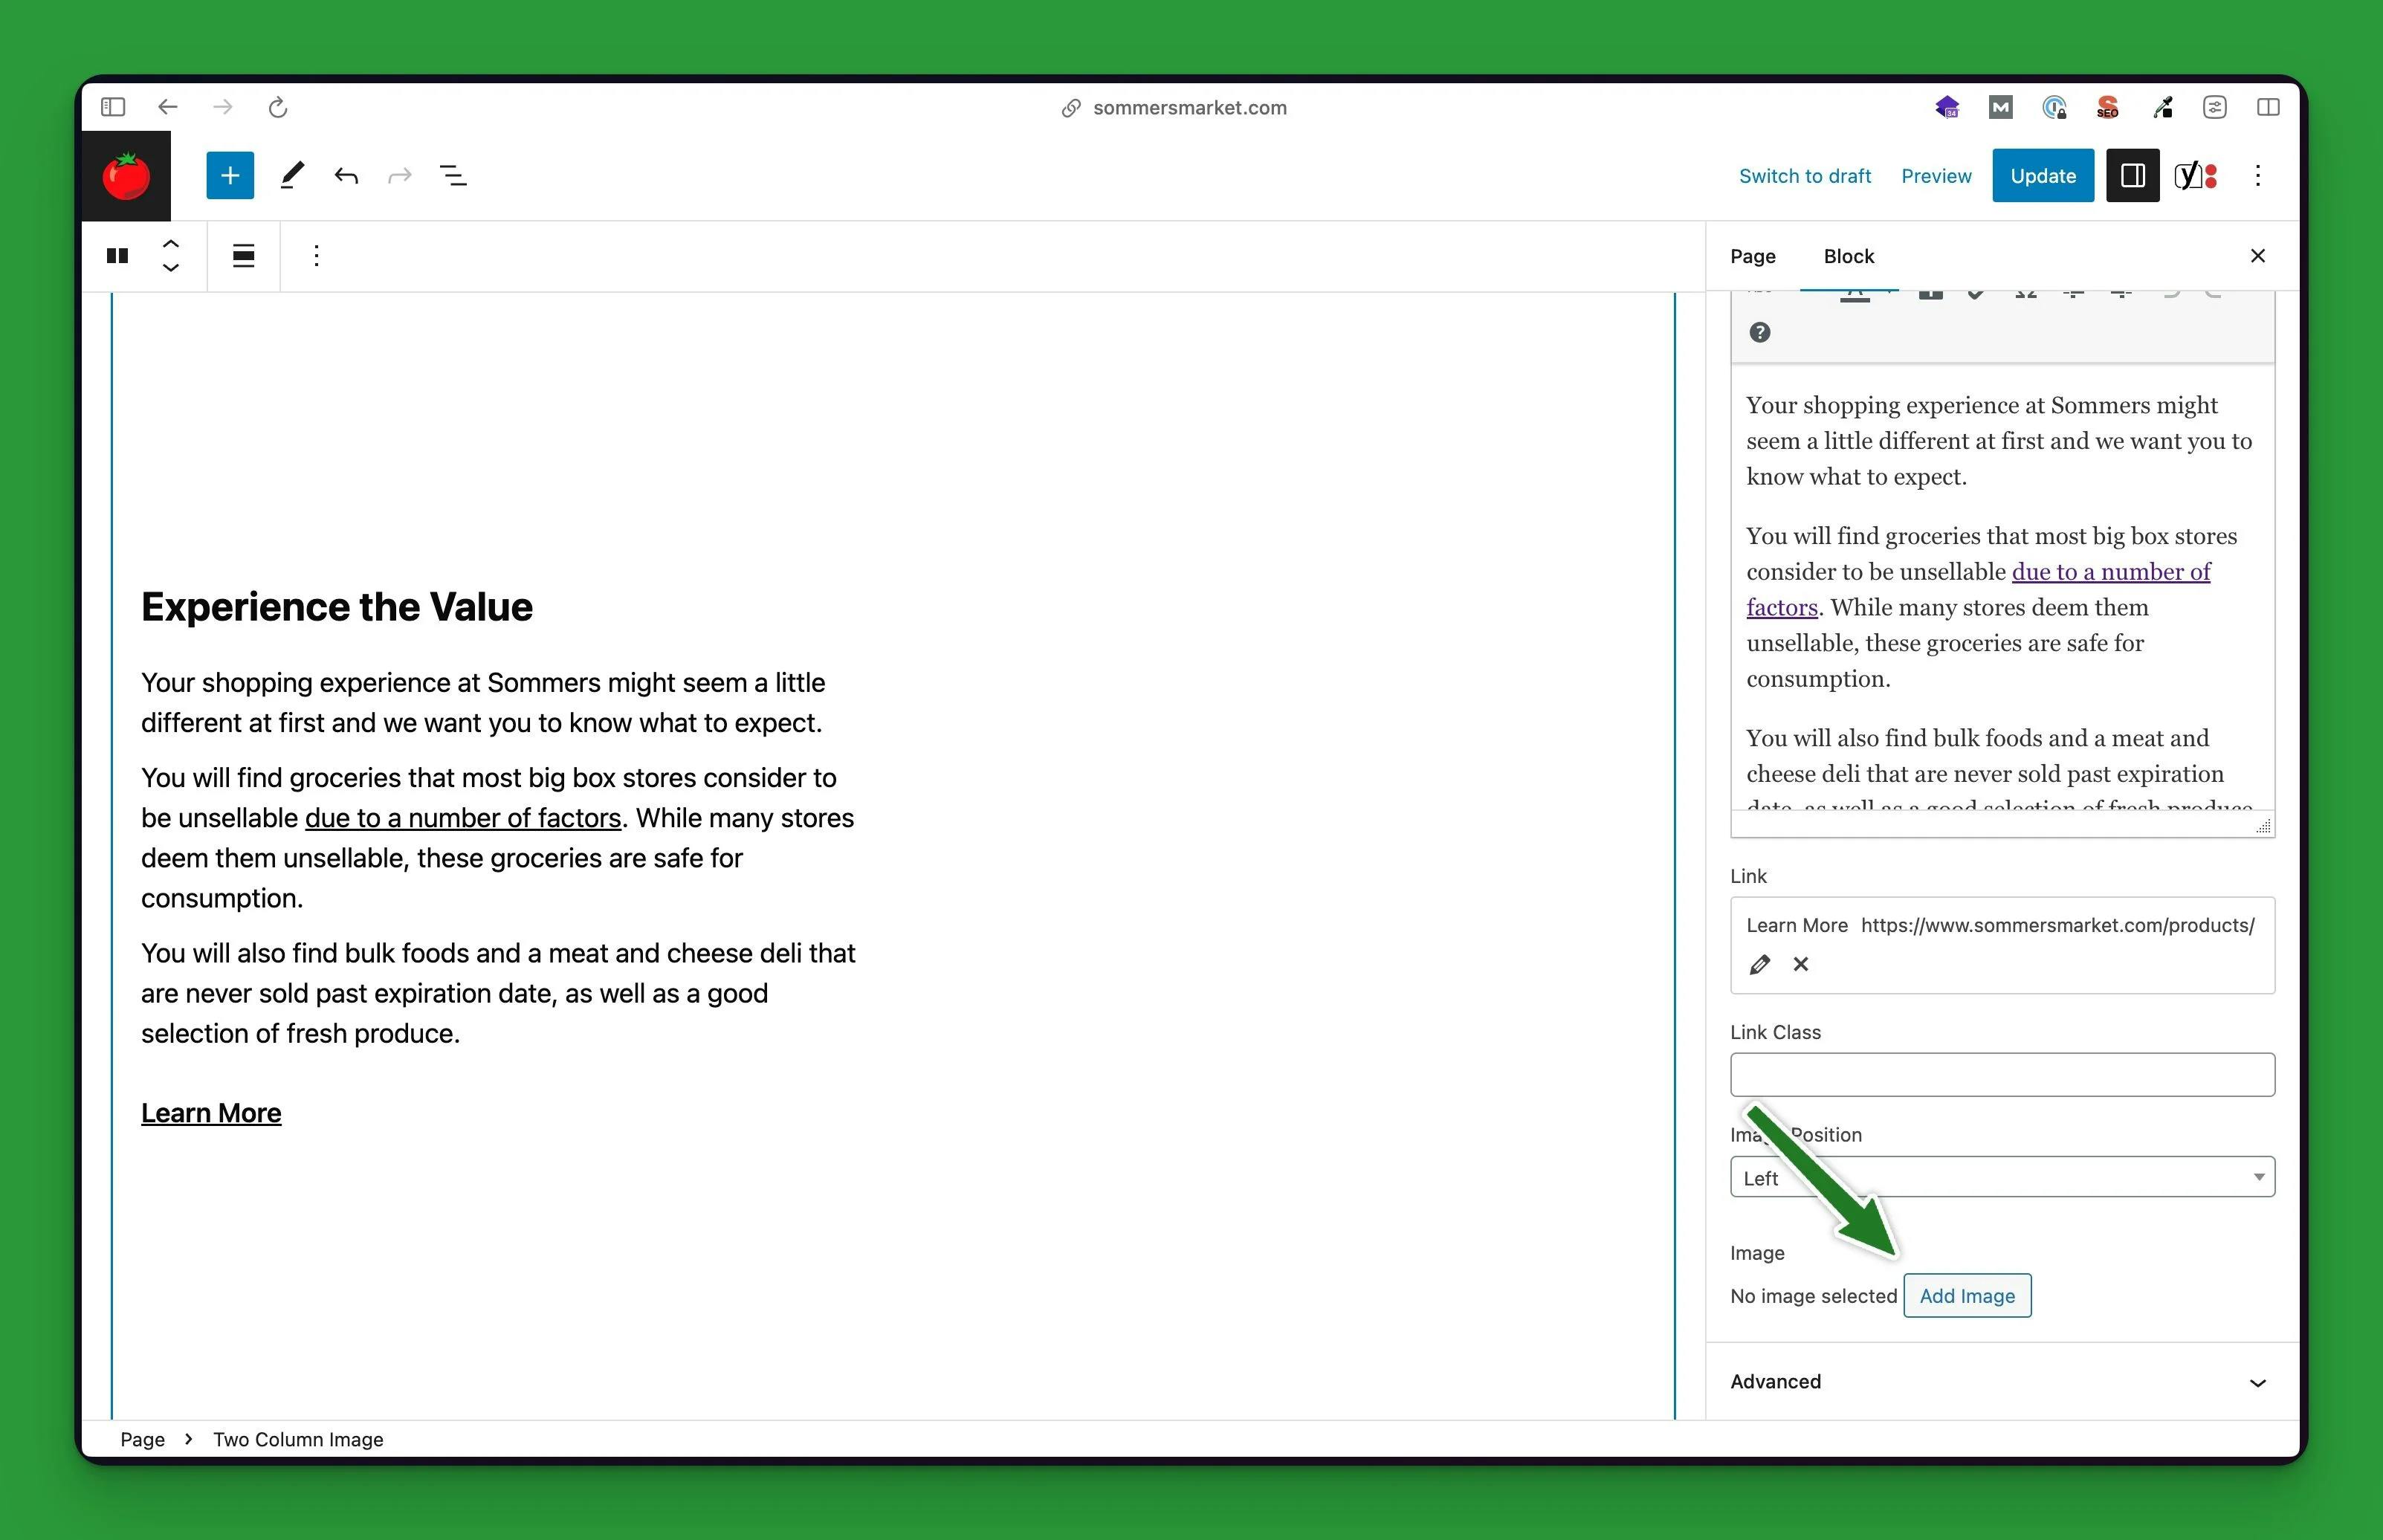
Images (and other files) can be uploaded from the media library by clicking the Add New button at the top of the page, next to the Media Library heading. You can also upload images right to the page you want them to appear on. You can do this by opening the page editor for the page you want to add the image to and either add an image block by clicking the plus sign (+) and searching image, or add a custom block that displays an image and add the image to the block from the sidebar.
In the image below we've add a custom Two Column Image block and we're going to add an image by clicking the Add Image button in the right sidebar.
Optimize images before uploading
It's best practice to compress your images and resize them if necessary before uploading them to your website. When resizing images, you just want to make sure that they're no larger than the largest size they'll be displayed at on the website. This will help save space on the server your website is hosted on and ensure that large images aren't slowing your website down.
Add alternative text to images
When you add new images to your website it's important to make sure that every image has Alternative (Alt) Text. Alternative text is the text that gets displayed if an image is unable to load for any reason. This is also what gets read to users visiting your website using a screen reader.
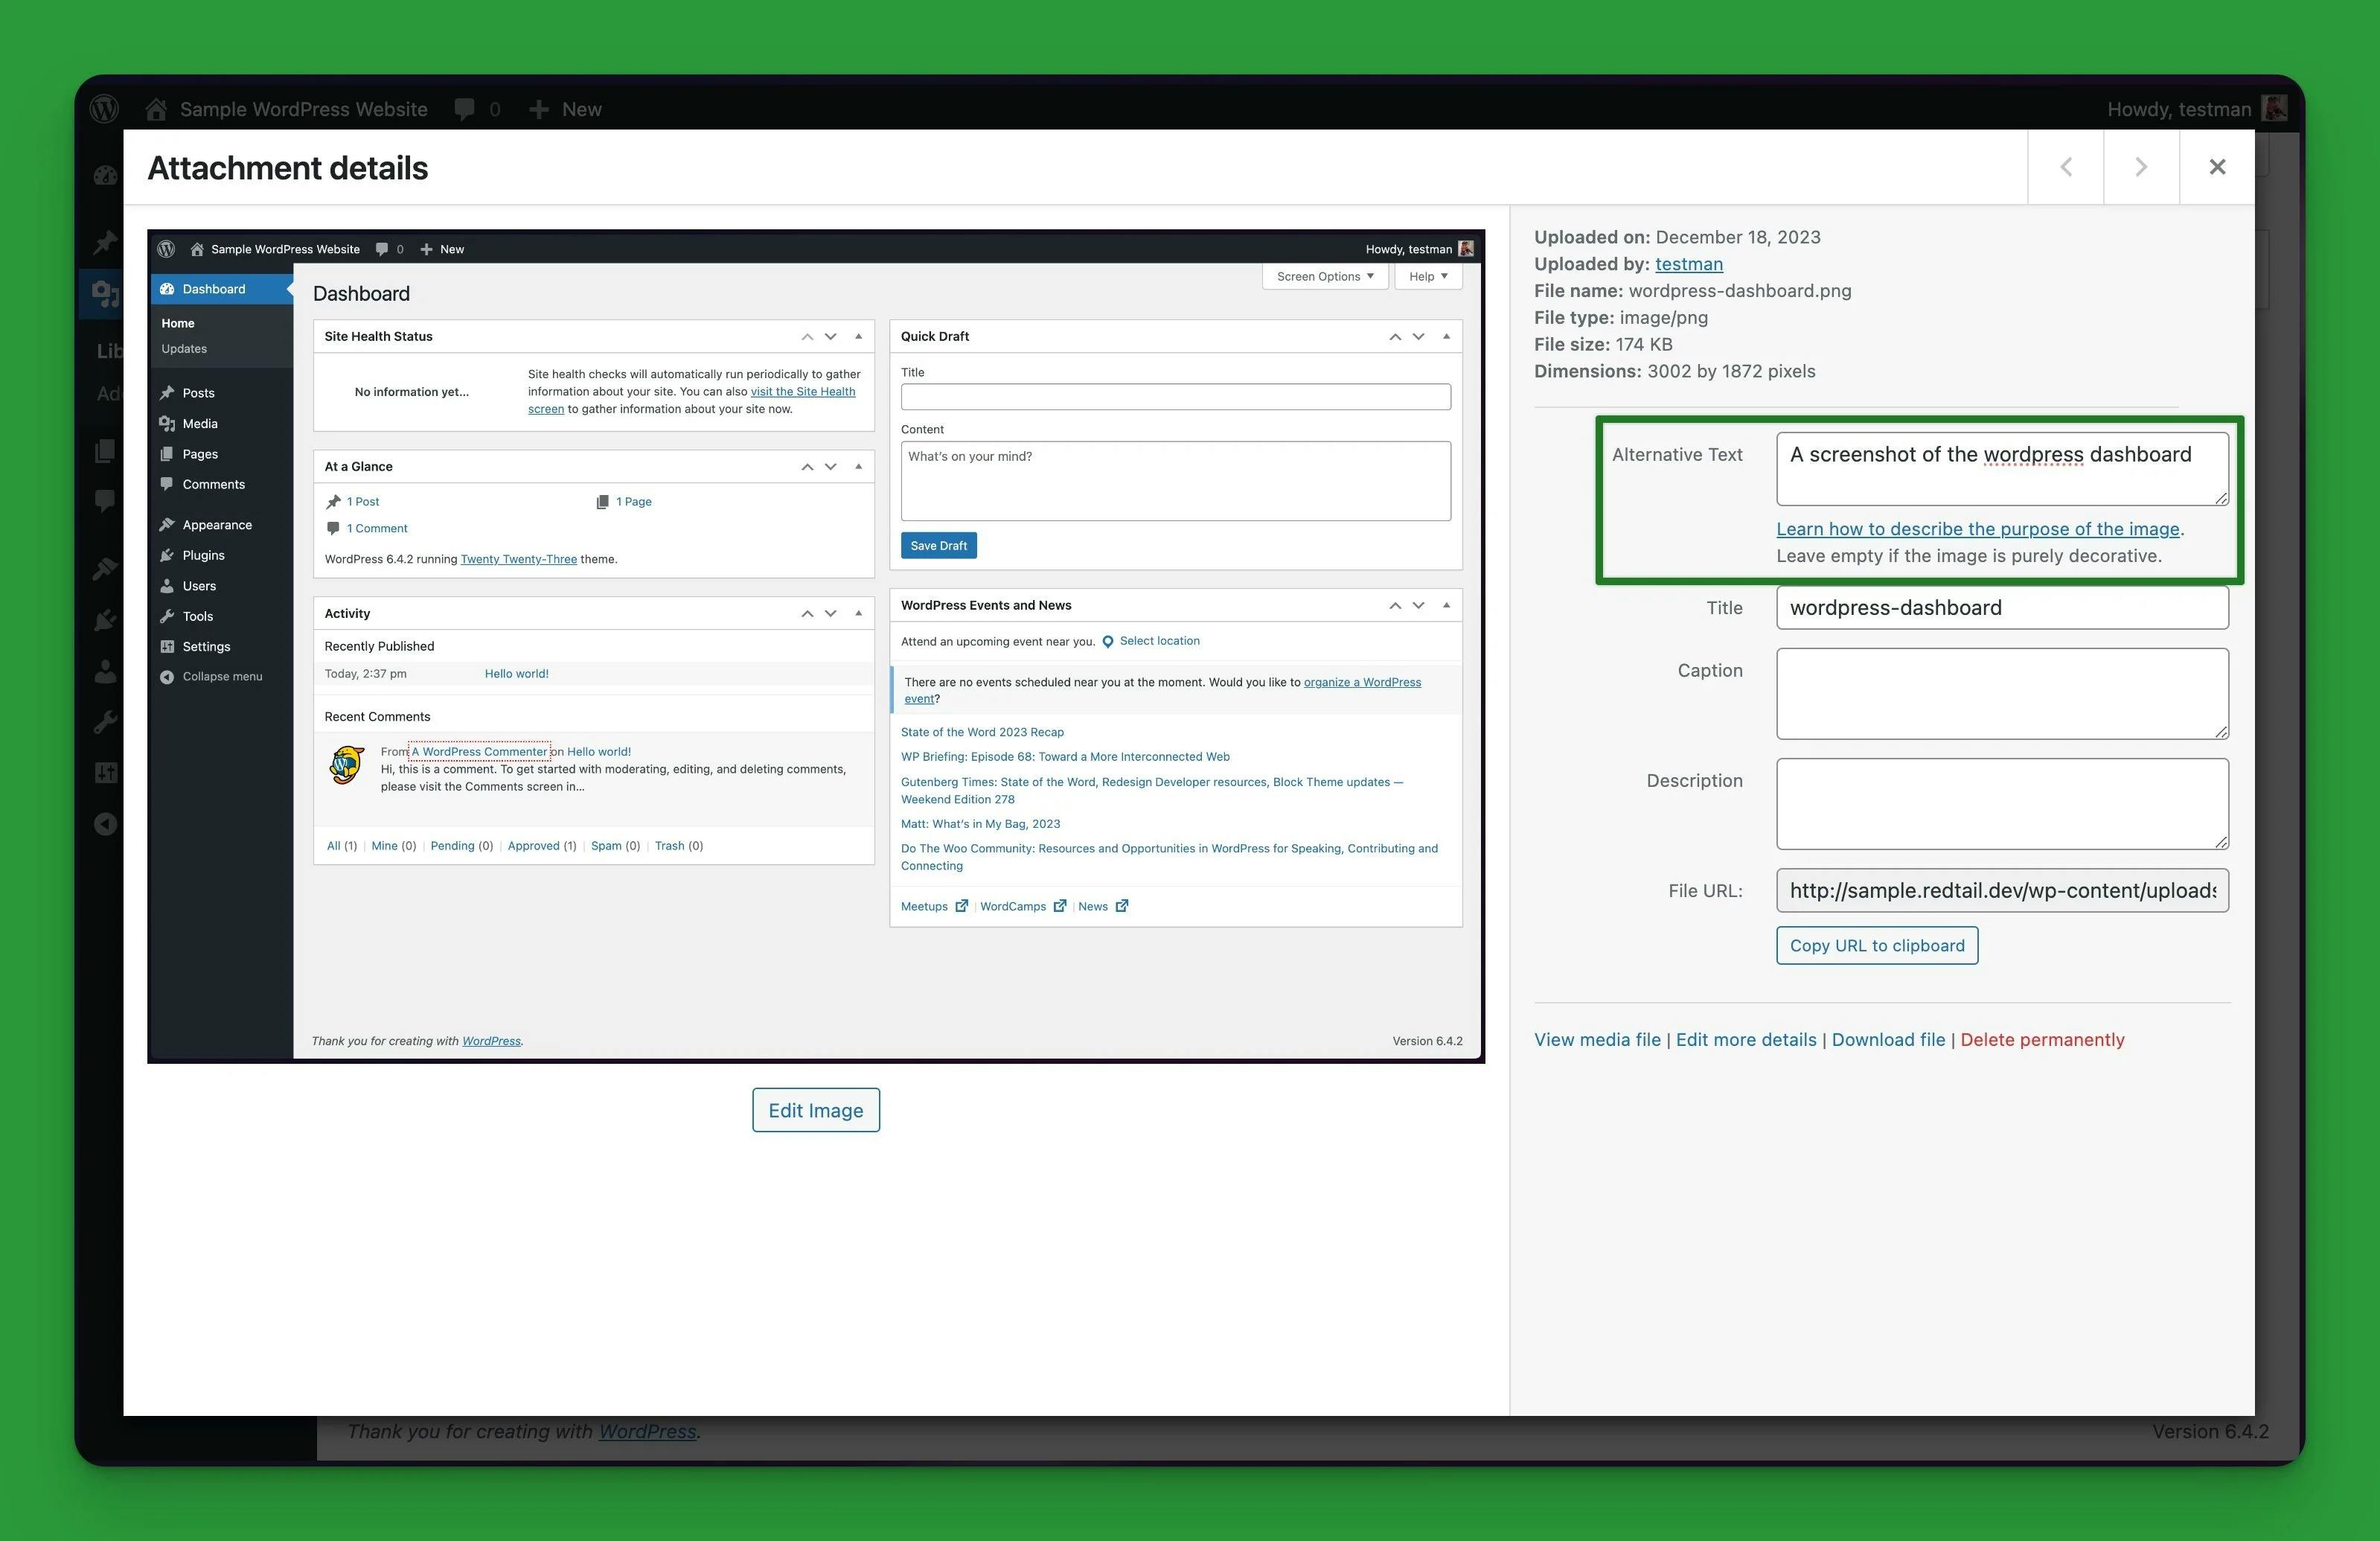
Example alternative text
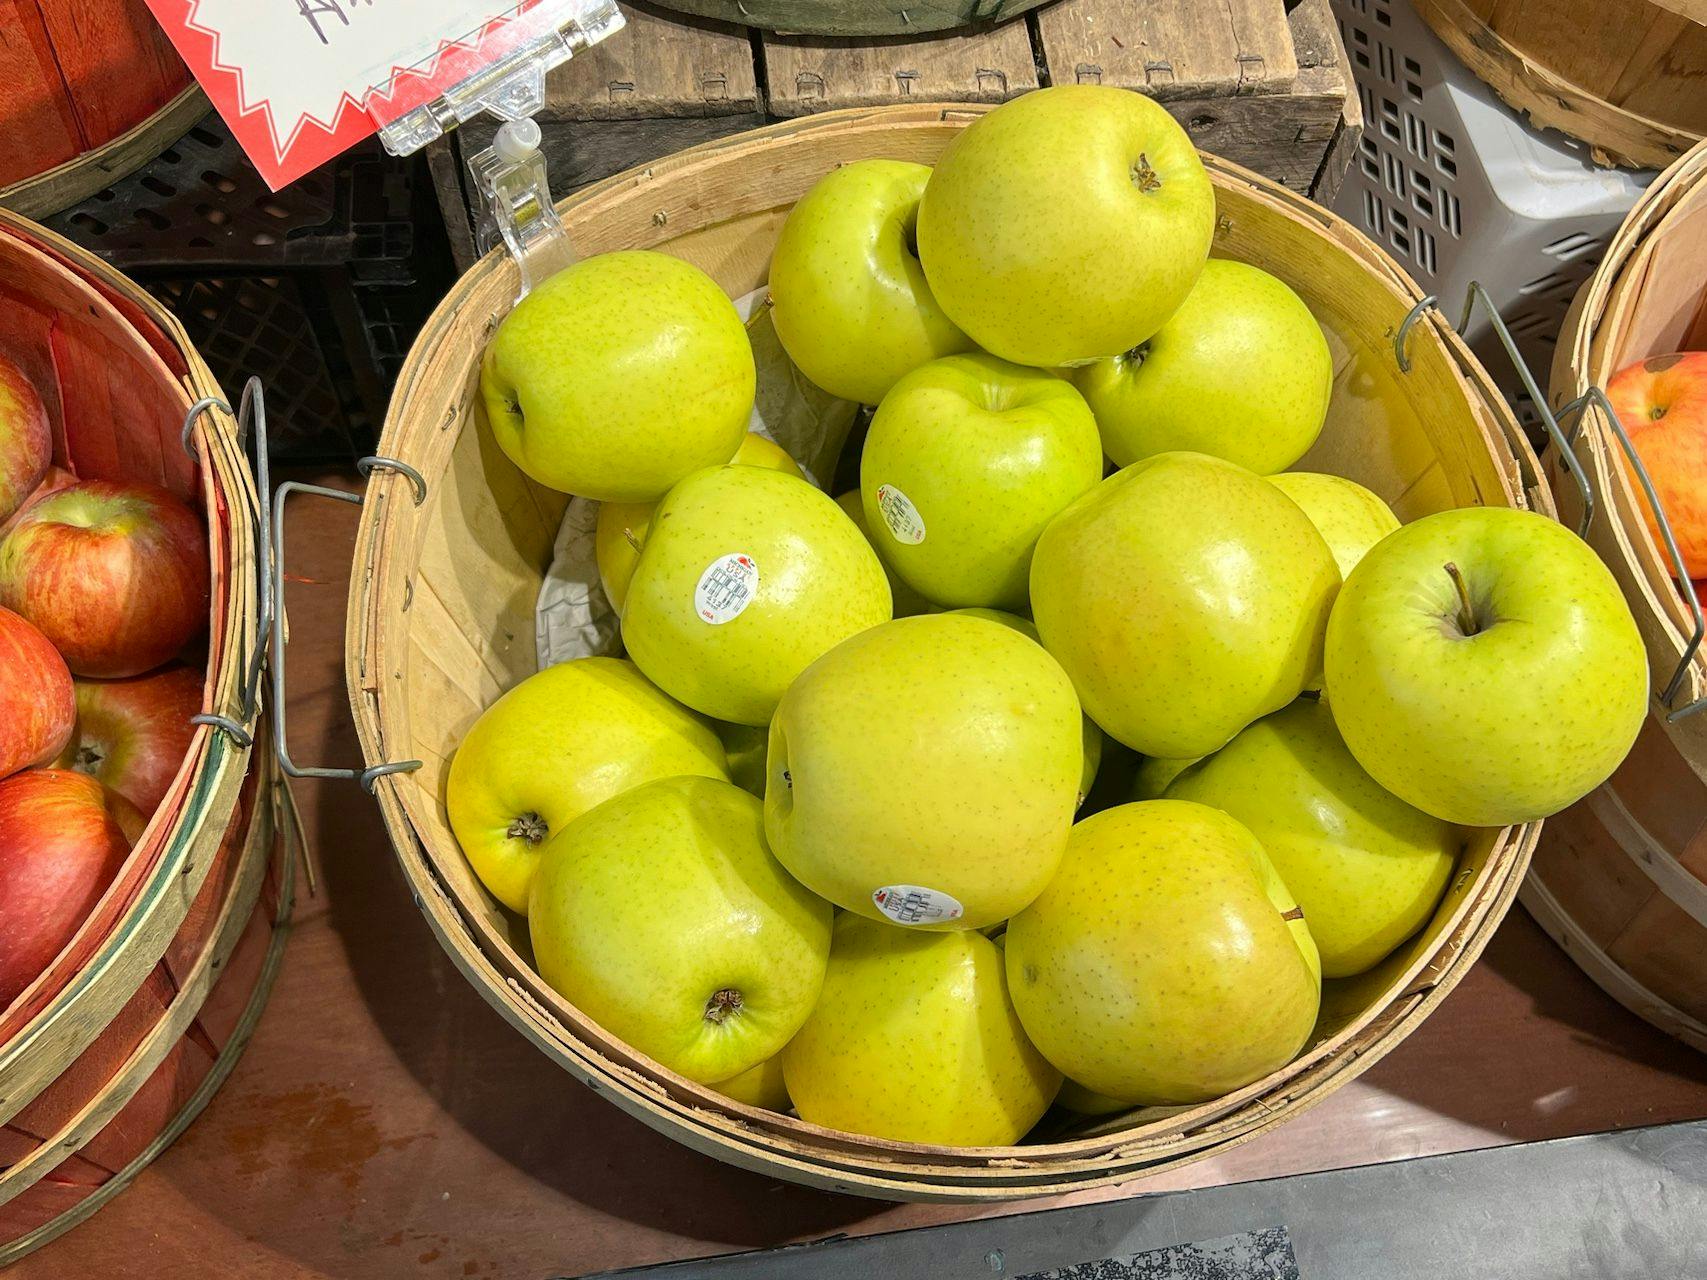
When setting alternative text for an image you want to describe what's happening in the image, rather than simply labeling the image. For example, in the image below a poor alternative text would be something like apples, while a good alternative text would be something like a barrel full of golden delicious apples.
An easy way to come up with good alt text is to pretend that you’re describing the picture to a friend over the phone.
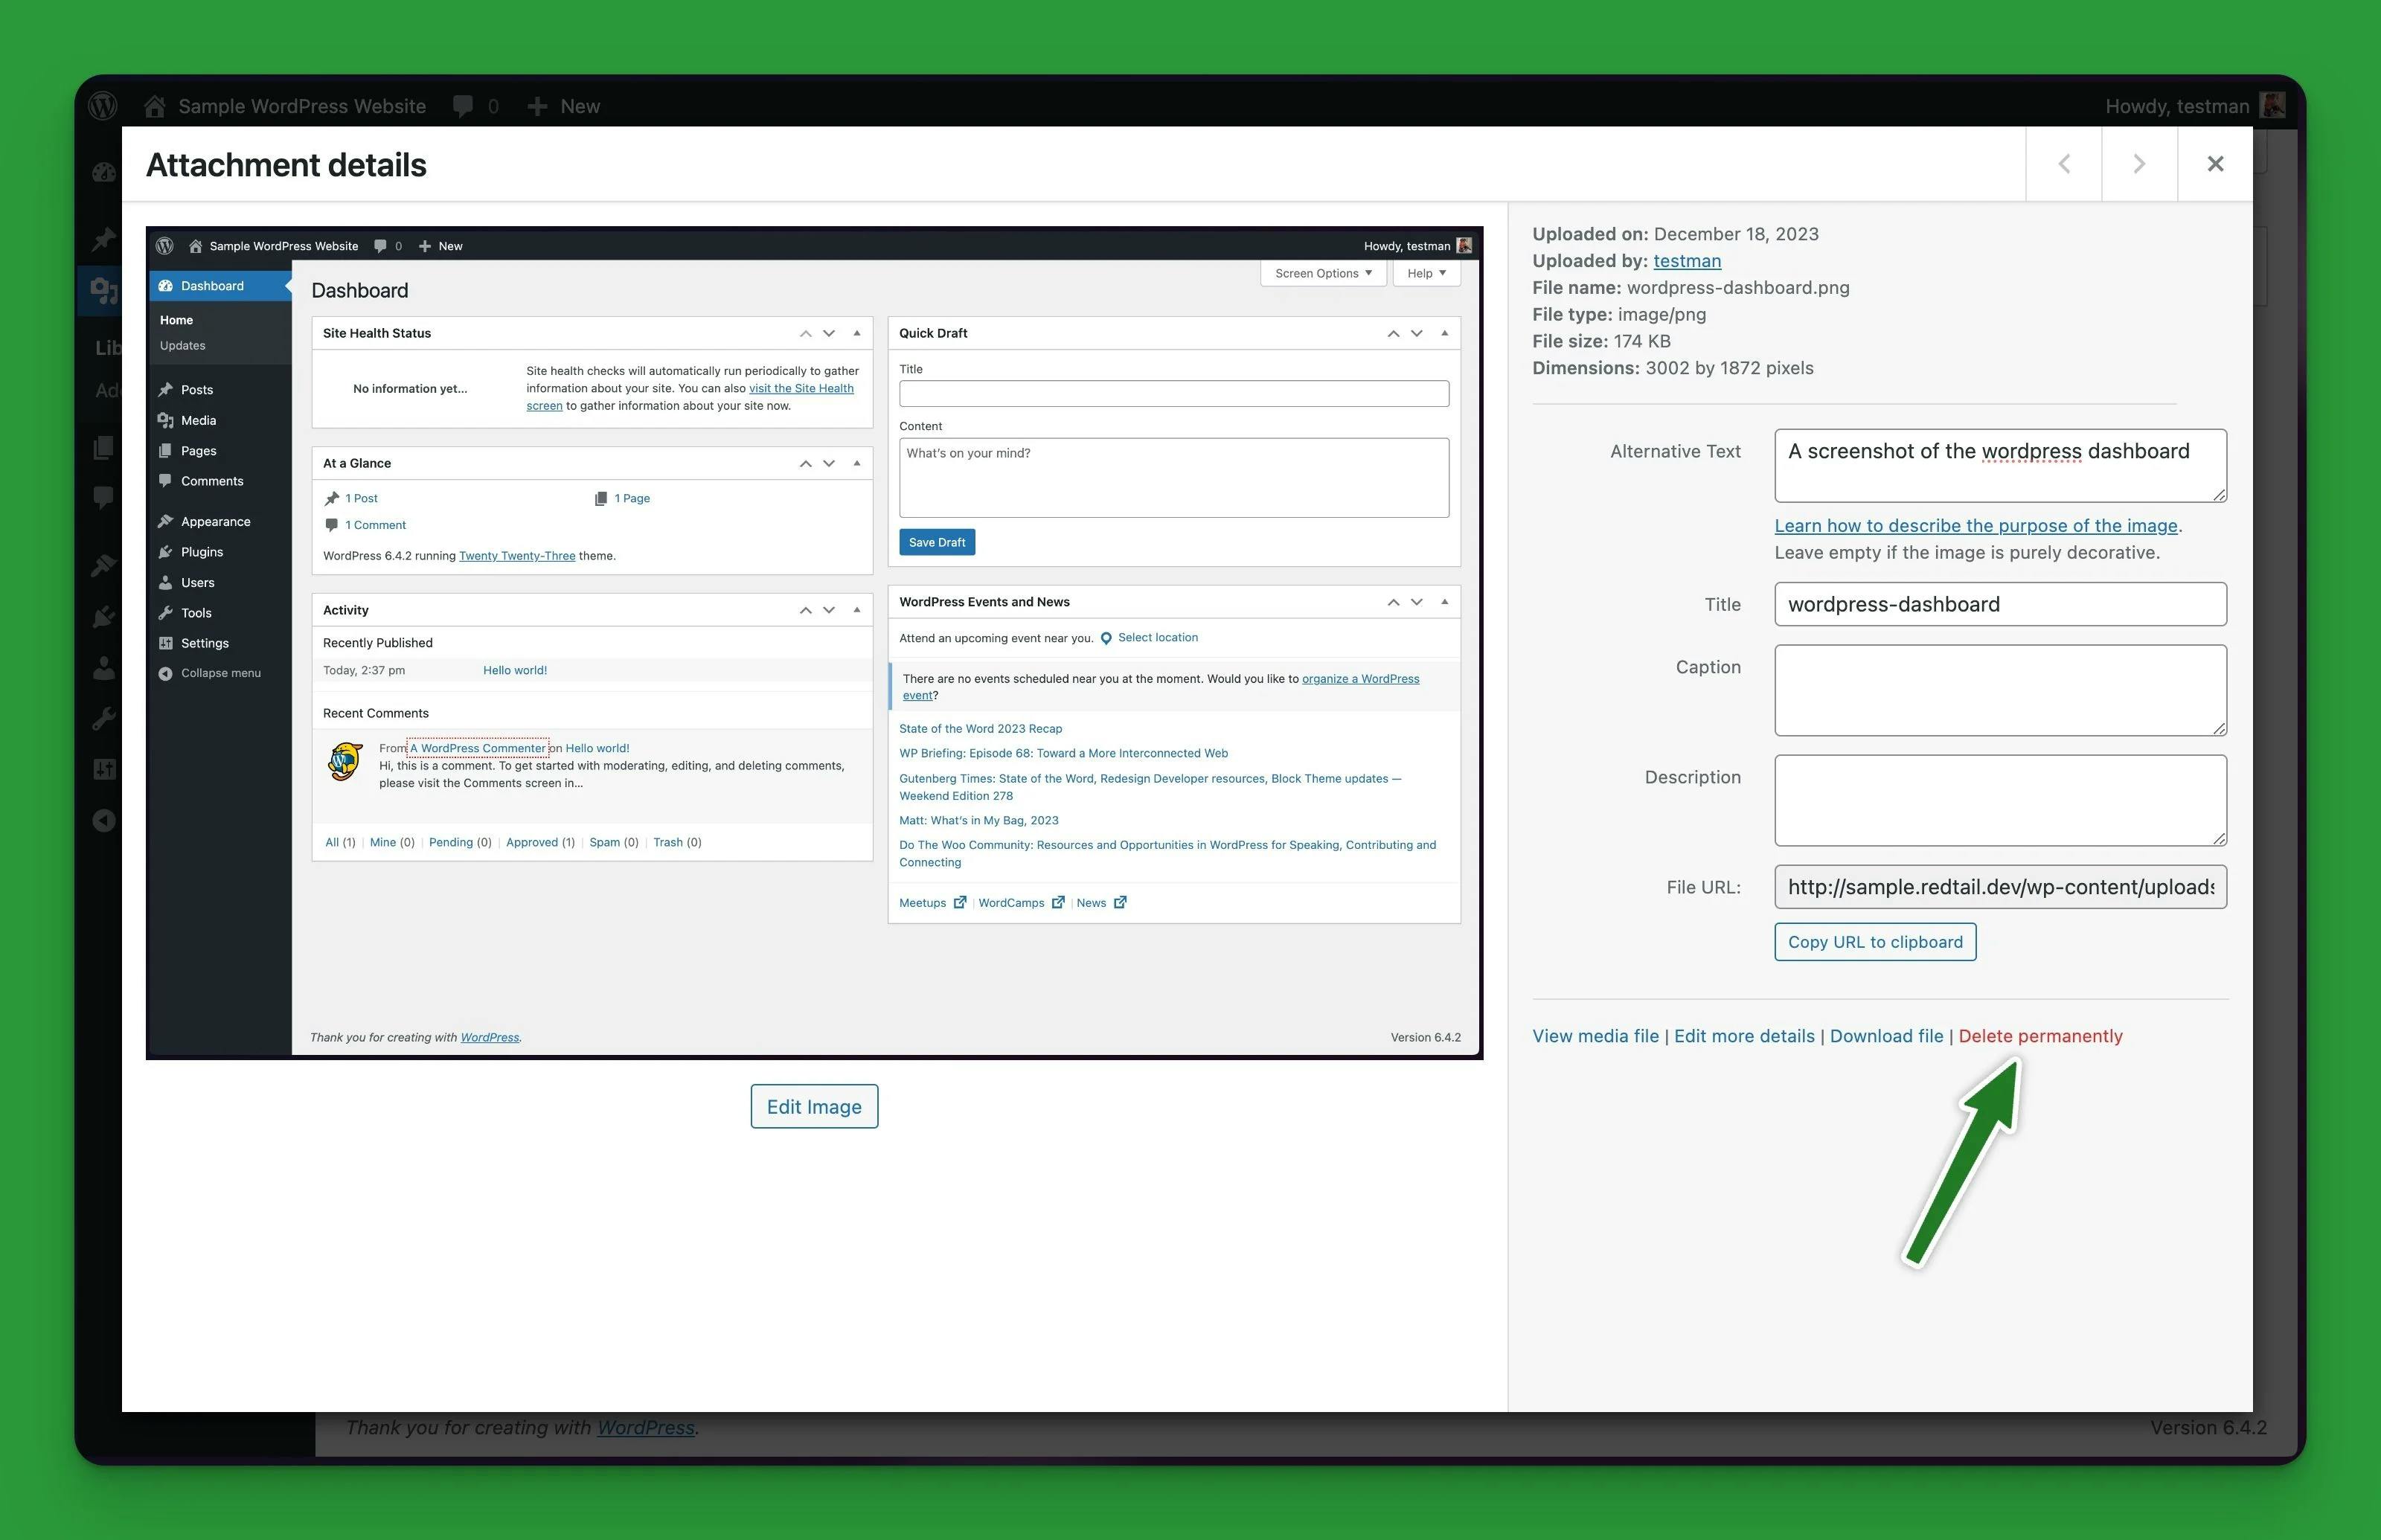
Delete old images
When an image is no longer being used on your website it's best to delete it so that it no longer appears in the media library. This will help save storage on the server your website is being hosted on, as well as declutter the media library of any unused images.
Comments
The comments page is where all the comments users have left on your website will show up, if you've activated comments on pages and/or posts. On the comments page you can approve/unapprove comments, reply to comments, and mark comments as spam or delete them.
Appearance
The appearance section on the black sidebar is where you can set your website's active theme, add or remove links from your navigation menus, and other website customizations. Generally speaking, these are settings that you shouldn't mess with too much unless you have some experience and know what you're doing.
Plugins
The plugins page lists all the plugins that are currently installed on your website. On this page, you can activate/deactivate plugins, delete plugins, or add new plugins. Plugins are great for easily adding functionality to your website but generally speaking, you want to use as few plugins as possible.
Typically when you want to add functionality to your website, it's best to build it into the theme your website uses. However there are some really great plugins that add functionality that would otherwise take a lot of time and money to implement, such as The Events Calendar for managing events on your website.
Users
The users page is pretty straightforward. This is where you can add or delete users. You can also visit your profile where you can update your name, email, etc.
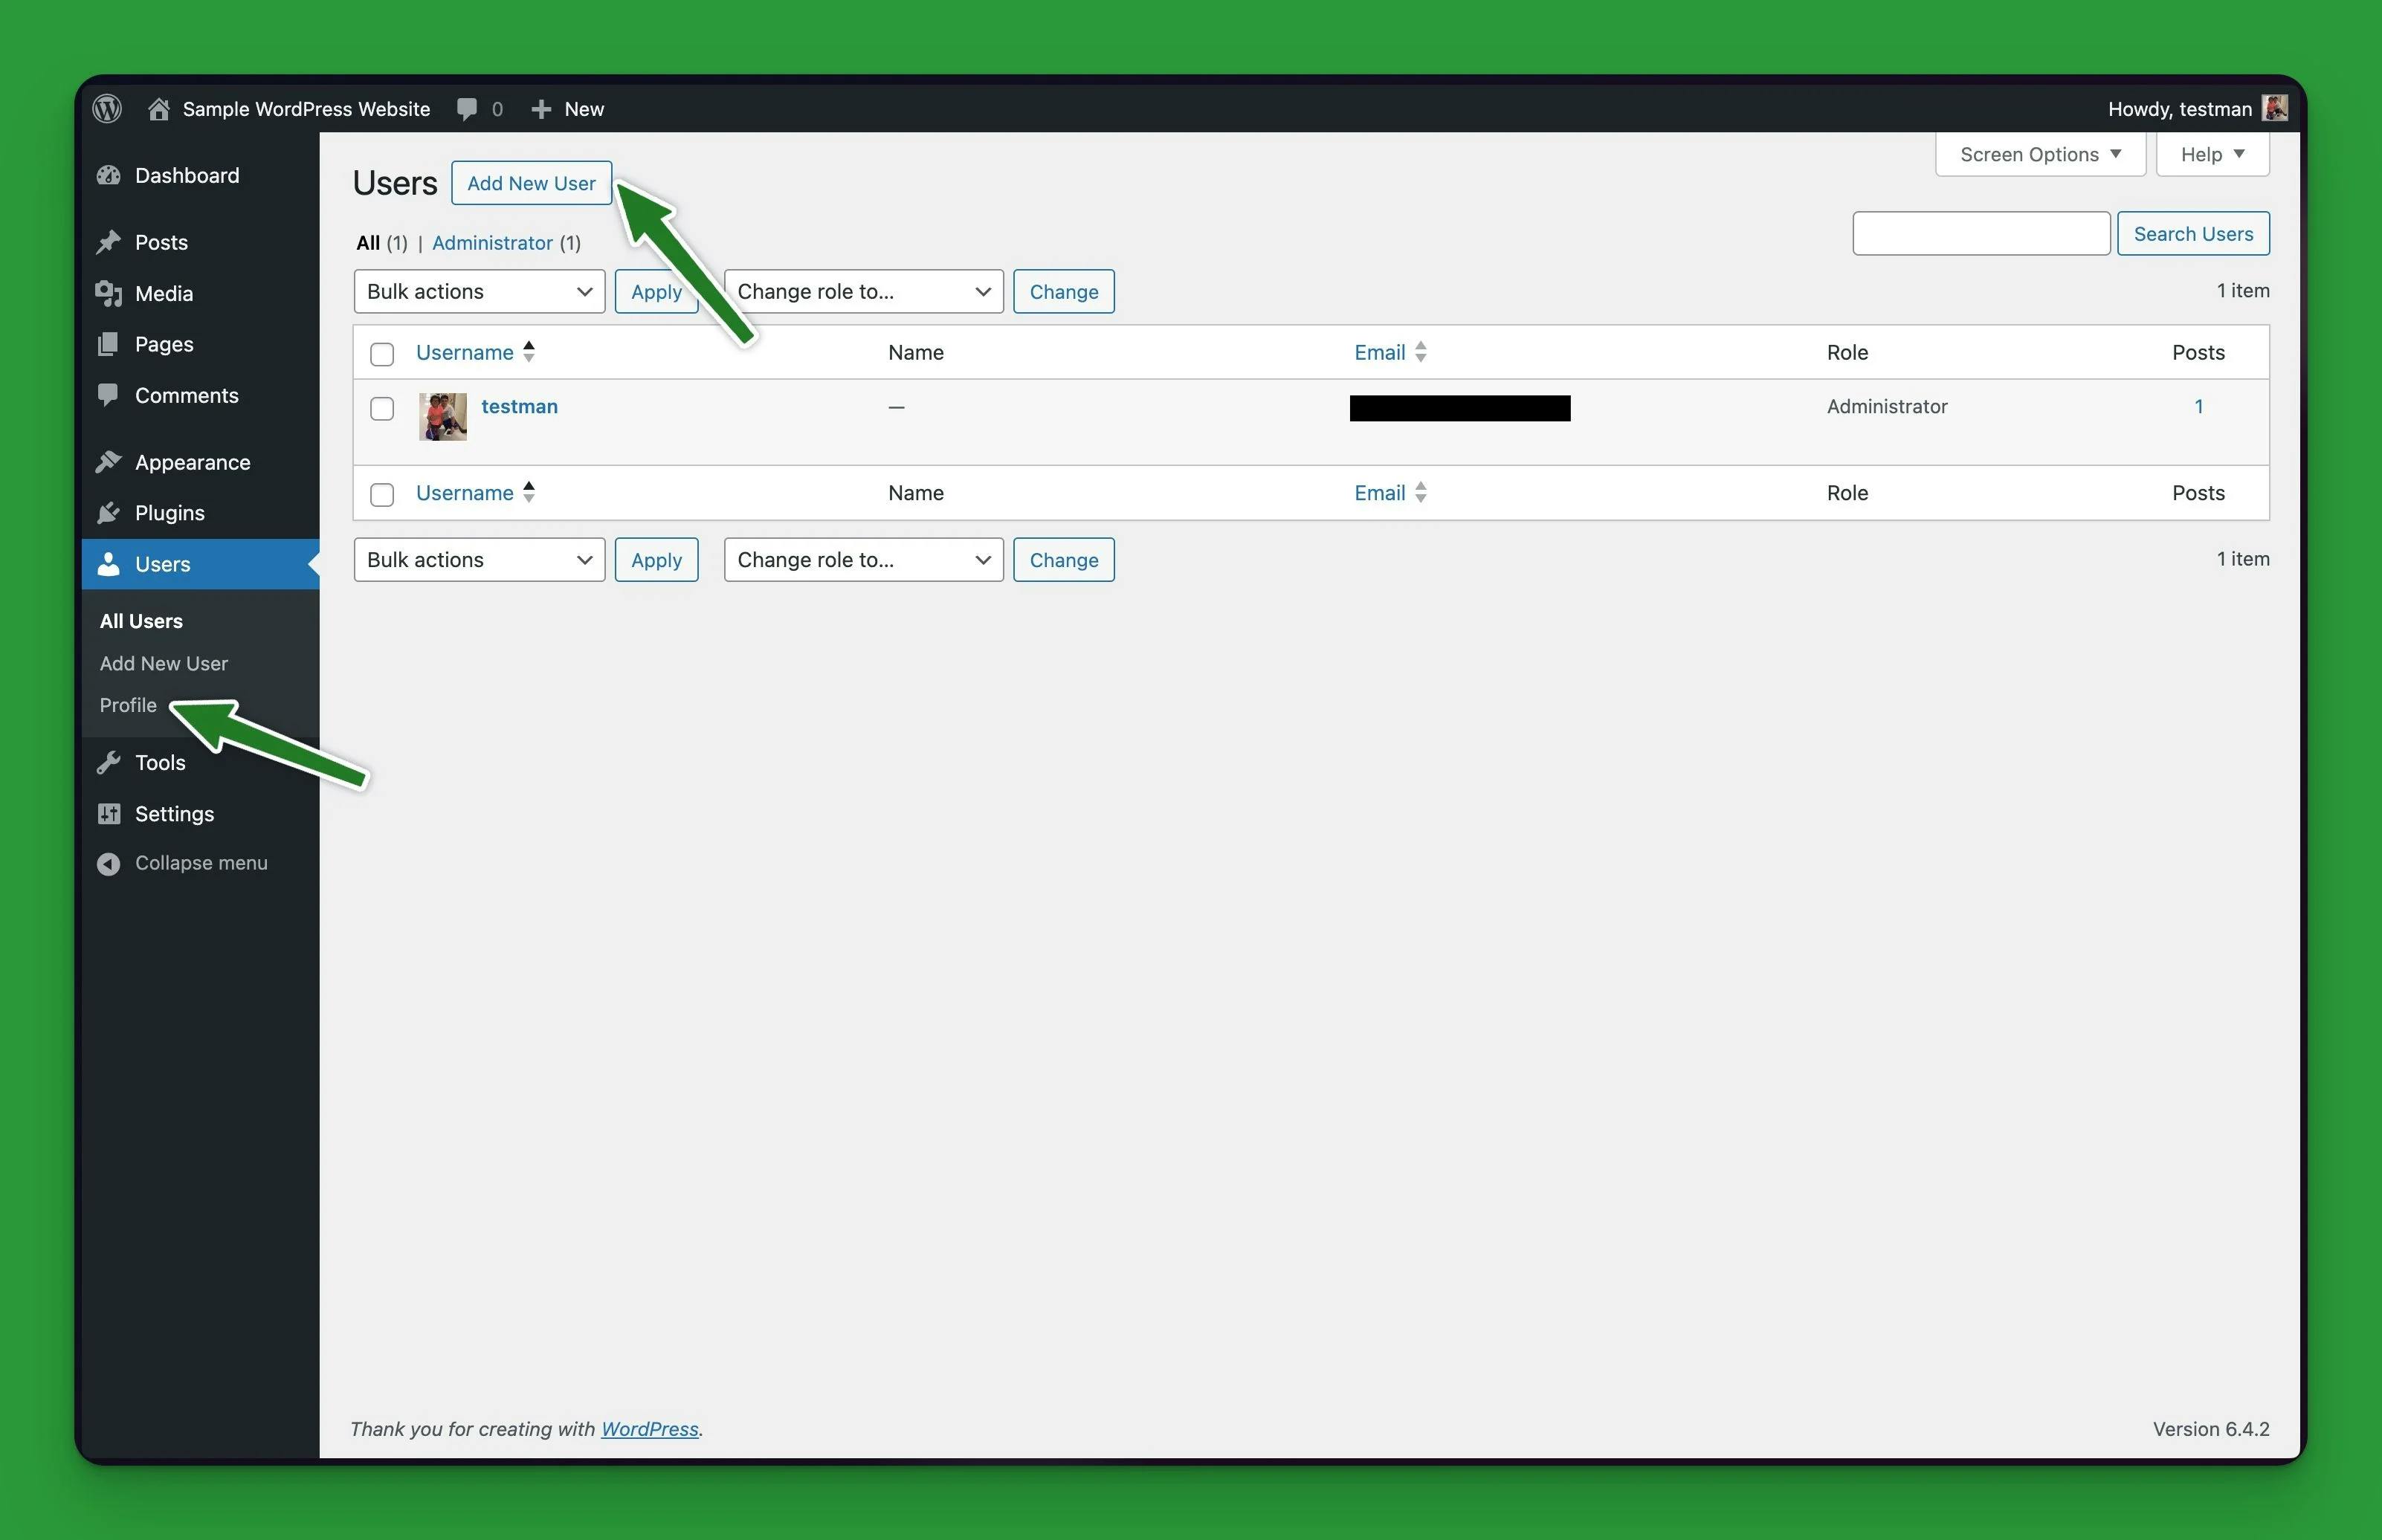
Add a new user
When you add a new user you will see a dropdown menu for assigning the user a Role. It's important to only give the user the role required for the task they'll be performing. For example, if you're adding a new user that will only be writing blog posts you wouldn't want to give them the role of Administrator. Instead, you would give them the role of Author.
To learn more about users check out this Beginner’s Guide to WordPress User Roles and Permissions.
Tools and Settings
The tools and settings pages are where you can set some of the configuration for your website. You may also find some plugin settings under these two sections. I'm not going to go into much detail here because this guide is really meant for users that shouldn't be messing too much with these pages.
Common Plugins
There are a few plugins that I commonly use on WordPress websites that I build so I wanted to include some basic guidance for those as well.
Gravity Forms
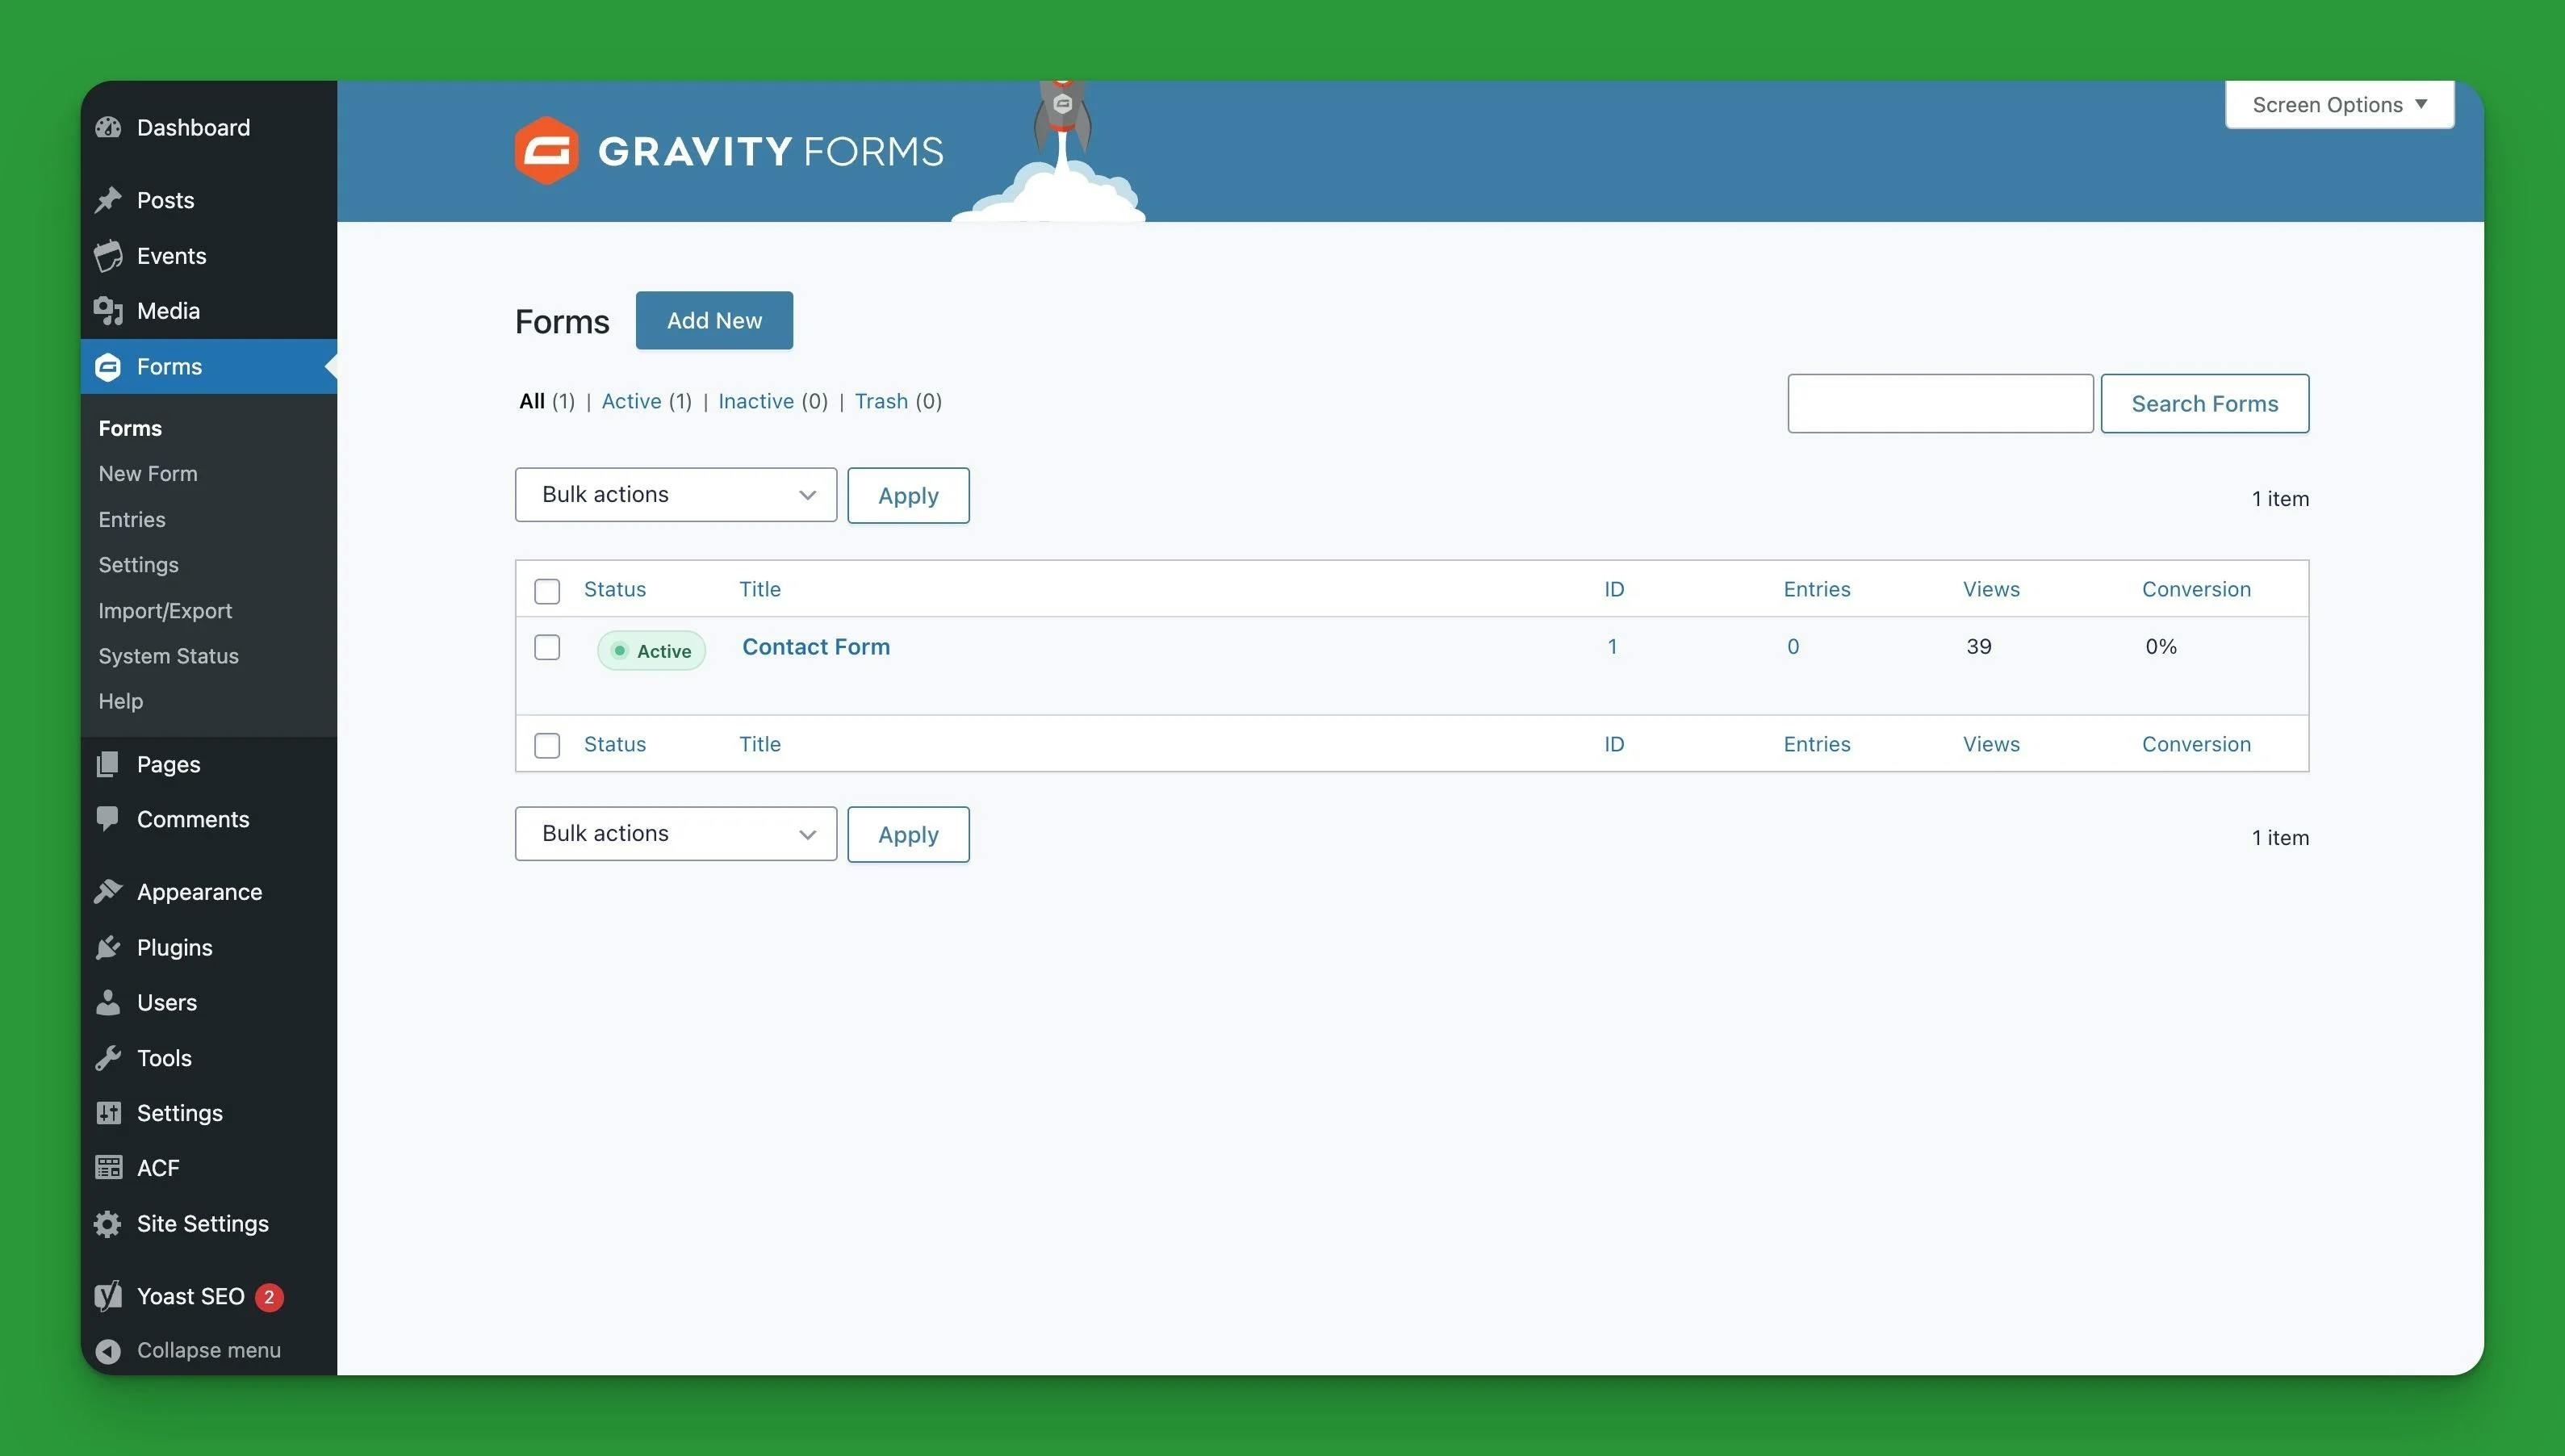
Gravity Forms is a plugin that makes adding contact forms to your website extremely easy. If Gravity Forms is installed on your website you will see a link the black sidebar that says Forms. Click on this link to go to the main Gravity Forms page where you'll see all your active forms listed. From here you can also add new forms or delete forms you no longer need.
Each form will show you all the submissions that have been made with the form and how many times the form has been viewed. You can edit the form settings by hovering over the form in the list and selecting Settings. Here you can change the name of the form, add restrictions, enable the anti-spam honeypot, and more. You can also set what email should be notified when a new form submission is made.
The Events Calendar
The Events Calendar is great for displaying events on your website. If The Events Calendar is active on your website you will see an Events link in the black sidebar. Click on this link to go to the main events page where all your events will be listed. Events are similar to posts, where you can add tags and categories.
The section of an event that is a little different is the The Events Calendar section picture below. This is where you set the event's start date and time, the location of the event, the event's organizers, the url for the event's website (if one exists), and the cost of the event (if it's not free).
